Getting Started
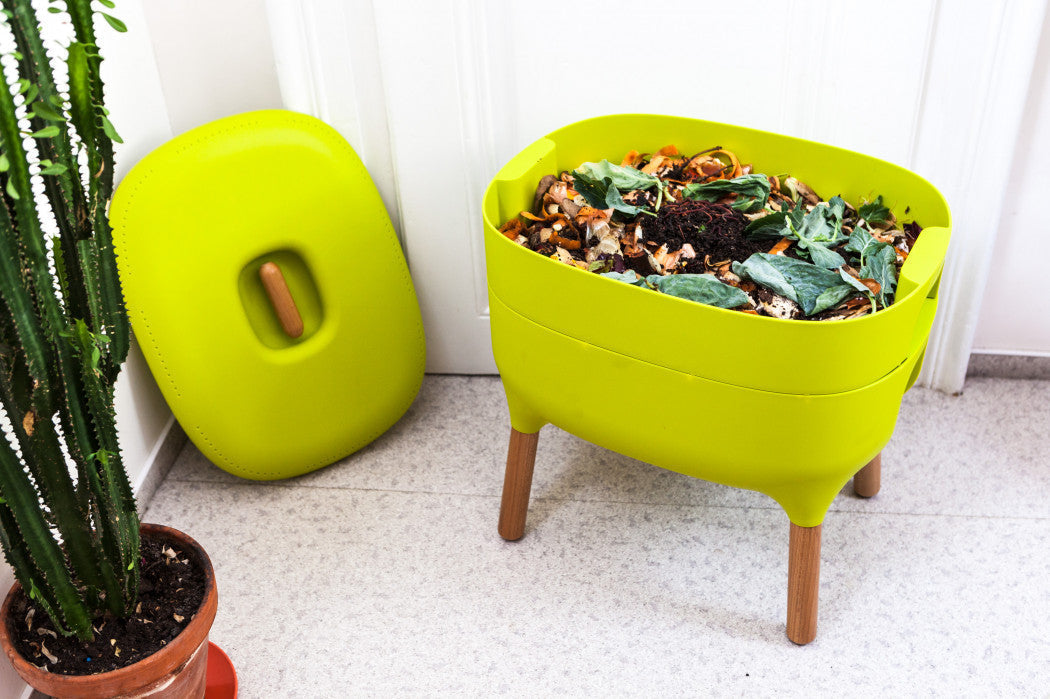
Our recommended first step with an Urbalive (and any stacking bin) involves lining the bottom of your first tray with some moistened kraft paper or newsprint. This helps to reduce the number of worms roaming down into the reservoir while they are still adapting to their new environment.
NOTE: This is the only time you will need to use this strategy, since you don’t want to block the upward migration of worms into the tray you add above.

Setting Up Your Healthy Worm Habitat
Next, it’s time to create a healthy habitat zone for your worms. We recommend filling the tray just over ¾ full with your starter materials, so as to leave some extra space for cover bedding, air flow, and of course, your future deposits.
Diversity is the key with creating the best worm composting environment. In general, we always recommend using multiple habitat materials (3-4 if possible), including different bedding and living materials. Additional amendments, such as BioChar, and pH buffer/grit (rock dust/oyster shell flour) can further boost the environment in various ways, but aren’t mandatory.
A great bedding mix you may want to try is 40% shredded cardboard, 40% rinsed coco coir and 20% hemp tow. Some good choices for living materials - that should be readily available in many locations - include aged, bedded horse manure (or other aged, bedded livestock manures), decomposed leaf litter (“leaf mold”), or even some rich loamy soil. Just be sure to avoid heavier mineral soils, since these can impede air flow and cause other issues like introducing unwanted organisms.

There are no strict rules for how much living material you include (and it’s not mandatory that you include any, since your worms will likely come with some as well), but aiming to mix in at least a small amount with your bedding is always a great idea. (Be sure to check out the living material article, linked above, for more information).
Similar to living materials, various amendments can boost our vermicomposting efforts, but aren’t mandatory for getting a new system going. We often recommend various rock dusts and oyster shell flour (we combine these in our pH Buffer Grit mix) as well as BioChar. If you choose to include these, you can add 2 tbsp of the grit mix per square foot of surface area, and with the BioChar, up to a cup or more, depending on the size of your system.

It can be helpful to prepare your habitat materials (including any amendments) in a separate tub or tray before adding them to your Urbalive. This will make it easier to get everything nicely mixed and moistened, and easier to achieve the recommended (¾ full) level in that first tray. Don’t be shy about making a lot! Any habitat mix you don’t use can be stored (in a breathable but moisture-retaining container) - where it will only get better with age - and can just be added to the system over time (great to add more any time you make a food deposit or remove some castings), and/or used to start up your second tray when the time arrives.
Also note that a great alternative to moistening with regular water - especially in cases where you don’t have living materials - is to use a dilute EM spray, or some form of compost tea or extract. This way you are moistening and inoculating your habitat with lots of beneficial microbes!
Getting an Urbalive Started with a PC Starter Kit
For those of you who happen to buy one of our worm starter kits, here is the specific info you can use to get your Urbalive habitat set up!
1 lb Worm Starter Kit
In a separate tub or tray, combine your entire bag of shredded cardboard (1 pound or 5 L) with half of the coco coir from one brick (approx. 5 L) [once rinsed and fully hydrated the entire brick should expand to roughly 9 L], and half of your bag of hemp tow (½ pound or 2.5 L). Add two tablespoons each of the pH Buffer Grit and the BioChar.
Mix and moisten really well before adding to your first Urbalive tray (don’t forget the liner mentioned earlier). Your initial, small amount of kitchen scraps can be mixed right in with the habitat or added on top of the habitat materials (with a hemp blanket, and ideally some loose cover bedding over top).
Each tray has a volume of 21 L but given the fluffy nature of the materials being used, it’s more like 19-20 L. With your bedding materials and your 1 lb of worms that comes with inoculated habitat material (total volume of bag is 4 L), this should bring your total tray volume to 16-17 L, (not including the blanket and cover bedding).
½ lb Worm Starter Kit
In a separate tub or tray, combine your entire bag of shredded cardboard (½ pound or 2.5 L) with half of the coco coir from the one brick (approx. 5 L) [once rinsed and fully hydrated the entire brick should expand to roughly 9 L], and all of your hemp tow (½ pound or 2.5 L). Add two tablespoons each of the pH Buffer Grit and the BioChar.
NOTE: The key difference here is that you will need about 2.5 L of your own shredded cardboard to bring your total amount to ~ 5 L. Alternatively, you could add 2.5 L more of the coco coir or other similar bedding material that offers good water retention and air flow.
Mix and moisten really well before adding to your first Urbalive tray (don’t forget the liner mentioned earlier). Your initial, small amount of kitchen scraps can be mixed right in with the habitat or added on top of the habitat materials (with a hemp blanket, and ideally some loose cover bedding over top).
Each tray has a volume of 21 L but given the fluffy nature of the materials being used, it’s more like 19-20 L. With your bedding materials and your ½ lb of worms that comes with inoculated habitat material (total volume of bag is 4 L), this should bring your total tray volume to 16-17 L, (not including the blanket and cover bedding).
Adding Your Composting Worms
If you are already an active vermicomposter, an easy and effective way to start up your Urbalive is simply to transfer worm-rich material over from another system. This offers a more inexpensive, natural approach - with the added advantage that you’ll end up with plenty of rich, living habitat material to help kickstart the ecosystem in the new environment.
Adding bulk worms from a reputable supplier can work great too (and in most cases, you should still end up with some living material from the bag they come in). For the Urbalive we recommend starting with ½ to 1 lb of Red Worms.
The worms (or worm-rich material) can simply be placed on top of the habitat material in the first tray, and everything left to sit with the lid off in a brightly lit location, so as to encourage the worms to head downwards and settle in.

You can then add a small quantity of fast-to-breakdown fruit and/or veggie scraps - such as chopped up banana peels, melon, cucumber or lettuce (and other leafy greens) - and add a loose layer of cover bedding, such as shredded cardboard or straw over top. If you want to take things a step further, adding a worm blanket (such as our hemp blanket) as well can be a great way to enhance the habitat and increase the level of protection against pests and other issues. If you do use a blanket, you can either place it directly over your food layer (under the loose cover bedding),or over your loose bedding layer at the top of the bin.
At this point you are all set up and ready for vermicomposting! Simply put on the lid, and place the bin in a safe location (ideally indoors, in a climate controlled location - but a shaded spot outdoors, when temperatures are favourable, can be ok too).
Ongoing Feeding and Maintenance
Once everything is set up, it is important to give the worms the chance to get properly settled into their new environment. We recommend gently checking on the system once or twice a day initially, but waiting at least 2-3 days before adding another food deposit.
The more you can do to optimize these foods for the worms (and microbes) the better! Some great ways to do this include chopping the foods up really well, and mixing with living materials (don’t forget about any leftover habitat mix you might still have - this can be great to mix with your food).
Aim to feed your worms only once or (at most) twice a week. This reduces the number of times you are disturbing them, and greatly helps to avoid the possibility of overfeeding.
Food can be added in 1-2” layers just under your cover bedding (or worm blanket, if you are using one). This is a good opportunity to sprinkle in a small quantity of amendments - like a pH Buffer Grit, BioChar, or crushed egg shells - if you have them. Any amendments you have can be added on a monthly basis. With the pH buffer/grit you can add 2 tbsp per square foot of surface area and with the BioChar, up to a cup or more, depending on the size of your system.
Be sure to check out How to Feed Your Worms to Get the Best Results From Your Worm Bin for more information about this topic!
Also make sure to keep your bedding levels topped up, since the worms will process these materials over time as well. We suggest always making sure your habitat is at least 70% bedding, since this will greatly reduce the chance of encountering various problems.

Helpful Related Resources
- How to Feed Your Worms to Get The Best Results From Your Worm Bin
- Bedding - The Most Important Material in Your Worm Bin?
- DIY Plastic Worm Composting Bins
- Smelly Worm Bins - Possible Causes & Effective Solutions
- Common Questions About Harvesting Worm Castings
- How to Separate Worms from Their Castings
- What Is “Living Material”?

