Part 2 of Fall - A Great Time to Get Your Backyard Composter Going!
When you first take your GeoBin out of the box it will be pretty tightly wound up. You may find it helpful to lay it out flat with some heavy objects on either end, so as to help open it up more.

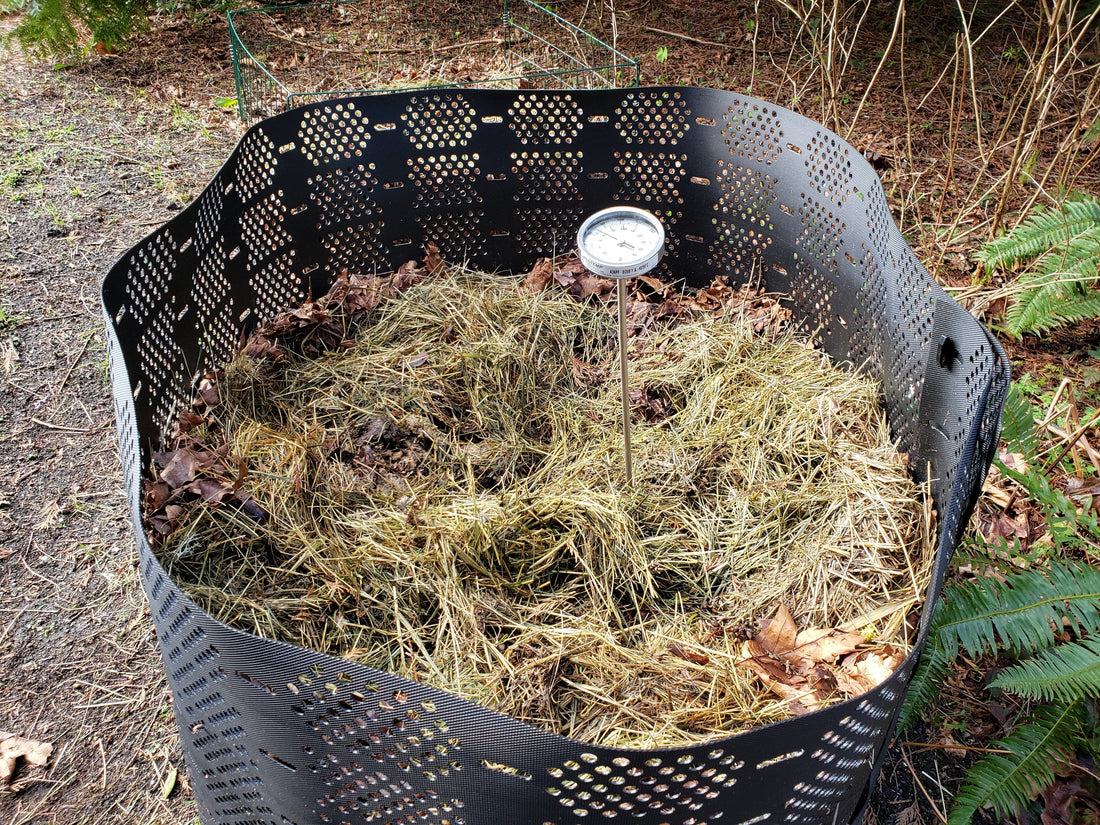
Next, decide how big you want it to be, and secure the ends with the clips that are included. We always like to make our GeoBin as BIG as possible, so as to maximize the composting potential! In the fall, this offers the added advantage of providing a lot more insulation and “fuel” for the microbes - so it’s much more likely you’ll be able to maintain at least some activity (especially in the middle, down near the bottom) all winter long.

Before you put the bin in place and start adding your layers of materials, we highly recommend digging a pit first, especially if you plan to add composting worms. You should aim for 1-1.5 feet deep, but any sort of depression will help you create more of a “safe zone” for your worms and hotspot for more microbial activity.
NOTE: To help ensure the highest level of protection, and avoid any instability of the GeoBin later on, make sure you size your hole so as to leave enough flat ground around it to support the base of the bin (i.e. the diameter of the pit should be a fair bit less than the diameter of the GeoBin). Alternatively - for even more protection - you may opt to create a pit big enough so you can actually set the system right down in it. Just make sure the bottom of your hole is level so the bin is more stable.

You can think of your pit zone as a sort of “false bottom”. It is ideal to load it up with a variety of both bulky and absorbent, high-carbon materials. Some good examples include fall leaves - which a lot of people will have access to at this time of year - hand-ripped corrugated cardboard, “scrunched” kraft paper (and other unbleached alternatives, like the gray paper you see in one of the images below), wood chips and other woody mulches.
This lower false bottom zone:
- helps to provide some separation from the very bottom of the pit,
- helps to lock in excess moisture that drips down from above,
- helps to support better air circulation in the lower reaches of the system, and
- provides your worms with a safe “home base” to hang out in when conditions are less favourable further up (eg cold days of winter and hot days of summer).


Once your layered carbon-rich materials are basically level with the soil surface, you can start to think about adding some food materials, as well as the worms themselves.
Let’s start with the worms.
If you happen to have some other worm composting systems on the go, a great way to stock your new system is to simply transfer over some worm-rich material. This way you end up with plenty of worms (and usually cocoons), along with other beneficial composting critters and lots of rich habitat material they are already used to!
If you are adding worms you've ordered from a supplier, we recommend also adding some additional rich living habitat materials directly below and above where the worms are added. Some good options here include aged, bedded horse manure (or other similar aged/bedded manures), rotten straw/hay, and rotten leaves.
How many worms?
Adding 1 to 2 lb of Red Worms to a system of this size should help you hit the ground running, but smaller quantities can work well too, as long as you set up the habitat properly (following the recommendations we’ve outlined here).

Remember, there are quite a few quiet months ahead, and these worms definitely know how to breed when conditions are right! ;-)
Make sure this worm zone is nice and damp. Keeping a watering can handy during the set-up process is a great idea in general, since it is better to moisten layers (especially dry materials) as they are added, rather than once the system is fully set up.

What Materials Are Best to Use?
It’s important to emphasize here that there are a wide range of amazing materials that can be added to a system like this - and fall is often a time when we all have access to the greatest variety.
Here are some of the materials we’ve used for our GeoBins (and other backyard system) set-ups:
- Fall leaves (which naturally get mixed with a bit of grass and other organic matter during raking)
- Straw and hay - fairly fresh material, but also rotten
- Corrugated and egg carton cardboard
- Different aged, bedded manures (eg horse and goat)
- Fruit tree leaves mixed with rotten fruit
- Woody mulch (we especially love alder mulches)
- Fruit pulp from a local juicer
We recommend not getting too hung up on needing any particular material(s) - such as the ones we’ve listed - but rather to focus on what you currently have available!
With a fall system you are adding composting worms to, it is important that you concentrate most of the food materials down towards the bottom. This way you avoid drawing them further up into the system, where they can encounter much colder temperatures and potentially die. These food layers can be directly over your lower worm zone (pit), and in the lower reaches of the GeoBin (or similar system), but don’t go any further up than that at this time of year.
With your false bottom and worm stocking zone in place, it is time to get your GeoBin positioned, and start filling it up!
We love fall leaves, especially Big Leaf Maple, at this time of year! The leaves themselves offer some food value, but as you can see (and as mentioned earlier), they always end up mixed with grass and other materials, which boosts the nutrition even further.

One last bit of food (aged, bedded horse manure in this case - but there are lots of other nitrogen-rich “greens” you can use), before we really get serious with the bedding.

We took advantage of an ample supply of beautiful alder mulch we had available.

We also had plenty of old straw and hay.

Apart from the carbon-rich materials, various living materials - such as composts, castings and decomposed leaf litter - along with other amendments, such as rock dust, oyster shell flour and biochar - can help to enrich your system and boost microbial activity even more (if you happen to have them on hand). In this case it was some really rich, loamy soil we had heaped up close by (NOTE: avoid using heavy mineral soils in composting systems since these can impede air flow and cause other issues)

Next, a nice thick layer of fresh straw.

Then, more woody mulch.

Even more straw!

Lastly, topping things off with a nice thick layer of raked Big Leaf Maple leaves. (We weren’t kidding about the importance of bedding in fall/winter worm composting systems!)

NOTE: If you don’t plan to use composting worms, we highly recommend adding more nitrogen-rich wastes in your fall layered systems so as to lower the C:N to a more ideal range (between 20:1 and 30:1). These “greens” can be added in alternating layers with bedding (and ideally living materials, amendments etc) all the way up.
To Tarp or Not to Tarp?

Given how open GeoBins are, some may wonder whether they should be covered with a tarp (or plastic sheet). Like many aspects of vermicomposting, the most accurate answer is "it depends", with season and climate being two of the major considerations. A tarp or plastic sheet can help the system to trap and hold heat. It can also help to retain moisture - with the trade-off being that little (if any) precipitation will be able to get in. It's also important to keep in mind that these types of covers can reduce air flow quite a bit.
Our overall recommendation is to keep your GeoBins uncovered during warmer months. This will help to ensure good airflow, prevent excessive heating, and expose the materials to rainfall. As temps drop in the fall and - in many regions - heavy precipitation settles in, using a tarp can be beneficial, since it can: 1) help to prevent the system from getting too water-logged and 2) block cold winds and help to absorb/retain more warmth.
As you'll see in Part III of this series, tarp use is one of our "next level" cold weather preparation suggestions. This is especially helpful if you live in a snowy region with moderate temperatures, and you want to extend your composting season. The tarp will help you take advantage of the insulating potential of snow, while still being able to access the system easily.
Choosing the right size, and securing your tarp properly are both an important part of the process. Your tarp should be big enough that you are able to cover the entire GeoBin (and outer insulation materials. If you are using them) and be left with 1-2 feet extra on all sides, so it can be secured properly on the ground. Any bigger than this and the tarp can become cumbersome to work with - any smaller and it will be more difficult to secure it properly. We’ve found that 8’x10’ works great for size, and recommend you invest a little more for a higher-quality tarp, to help avoid the tearing and fragmentation you can encounter with the cheaper ones.
Also note that loose tarps can easily blow away or end up damaged in high winds, so it helps to secure them quite close to the base. An easy way to do so is simply to lay down multiple decent-sized rocks or bricks on top of the tarp, all around the lower perimeter of the GeoBin.
Next: Part 3 - Next Level Backyard Composting - Fall Prep
Previous: Part 1 - Fall - A Great Time to Get Your Backyard Composter Going!
Other Resources You May Find Helpful
- Backyard Composting - A Simple Method to Build Nutrient and Microbe Rich Compost!
- What is Living Material?
- Pumpkins - The Ultimate Fall Bounty For Your Worms
- Bedding - The Most Important Material in Your Worm Bin?
- Outdoor Vermicomposting 101
- Can I Add Red Wigglers to My Garden?
- Outdoor Cold Weather Composting Basics

